How to set up a simple automation in Zapier
This article walks you through connecting two apps in Zapier.
Q. I want to connect two external apps together. In a previous article about building RPAs that run automatically, you walked through connecting two apps together in Power Automate. My apps are not listed there. You mentioned Zapier having more options. Can you walk through connecting two apps in Zapier?
A. While Power Automate is the best for Microsoft’s ecosystem, it does not have the most comprehensive list of connecting apps. Zapier is the better tool for broader scope.
Before getting into the example, it is important to identify the problem and what success is. The example problem is: When creating a Discovery Meeting on my Calendly (scheduling app), I have to manually create the organization, person, and deal in Pipedrive (client relationship manager app). My goal is to have the organization, person, and deal be automatically created.
I will use Zapier to create a connection that passes information from Calendly to Pipedrive.
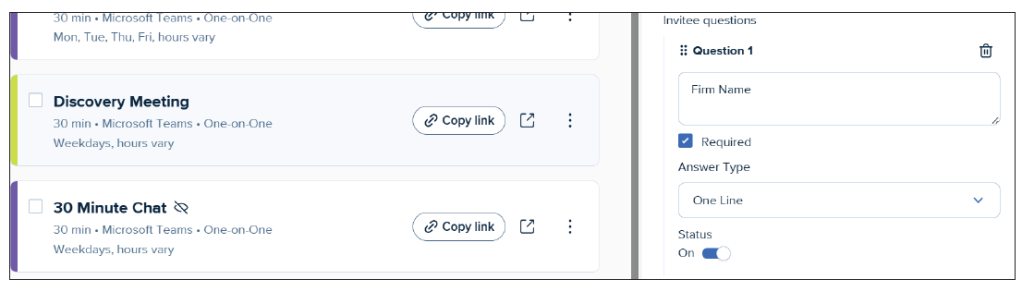
As a prerequisite, I have my Discovery Meeting event type set up in Calendly with a form question for “Firm Name.”
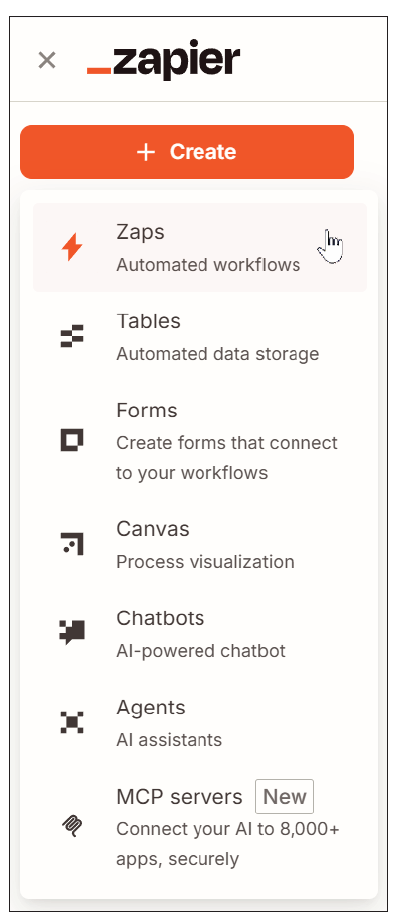
I start by going to zapier.com and signing in to my account. Then I click on + Create in the top left corner and select “Zaps,” as shown in the following screenshot. If you don’t have an account, you can sign up for a free trial.
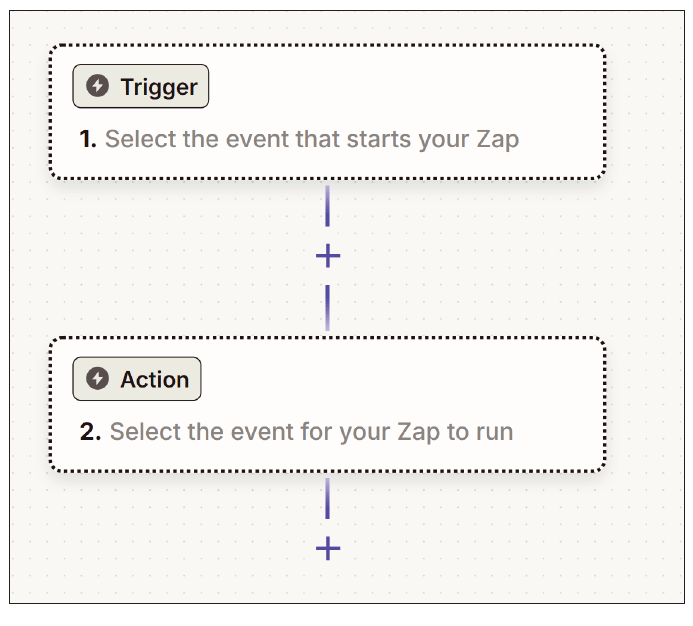
When the Zaps editor loads, it starts with a Trigger and an Action. I click on Trigger, which brings up an app list. I search for “Calendly” and select it, as indicated in the following screenshots.
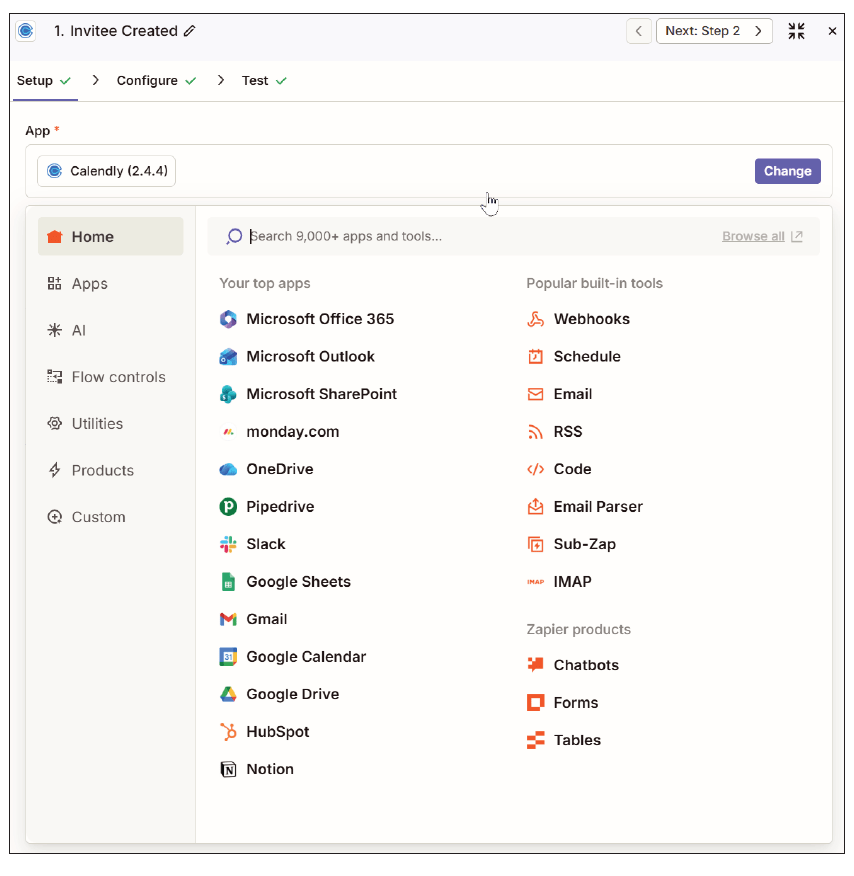
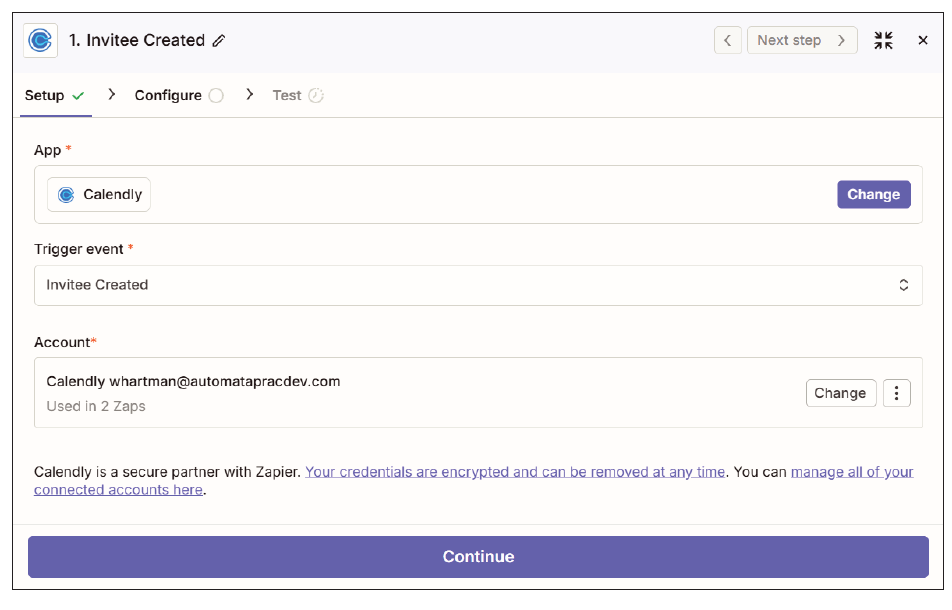
This opens the Setup screen for selecting the Trigger event and Account. For the Trigger event, I select Invitee Created from the available drop-down options. For Account, I click Select and connect to my Calendly account. I click Continue as shown in the following screenshot.
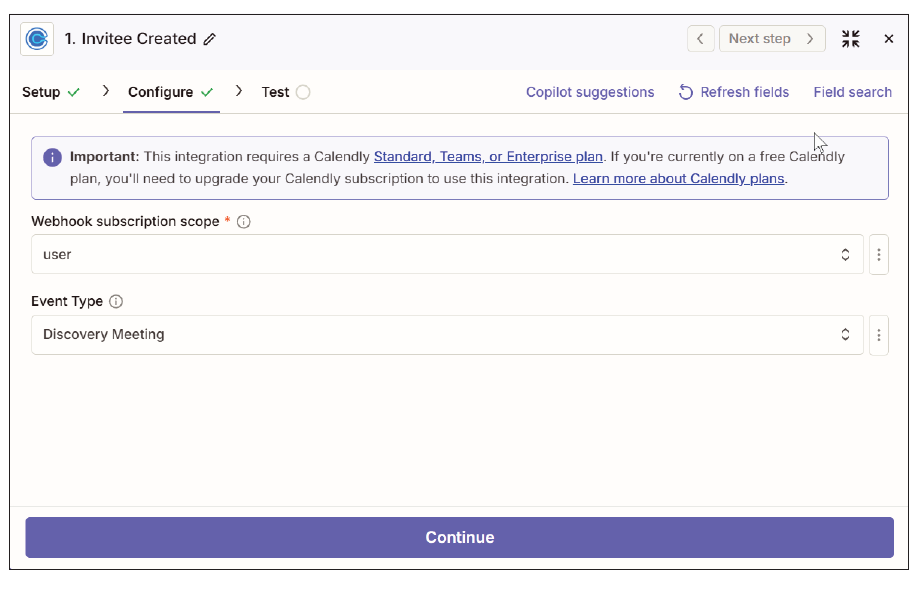
The next screen is for configuring the Trigger. For the Webhook subscription scope, I select user from the drop-down options. For Event Type, I select my Discovery Meeting event that is set up in Calendly. Then I click Continue to go to the Test screen.
To run tests, Zapier needs a recent event to use as a sample. While on the Test screen, I go to my own Calendly and make a Discovery Meeting for myself using a personal email address. Doing so will create the event that Zapier can use for the rest of this walk-through. In the following screenshot, I can see the invitee email and name. Note the scrollbar showing additional details from the event.
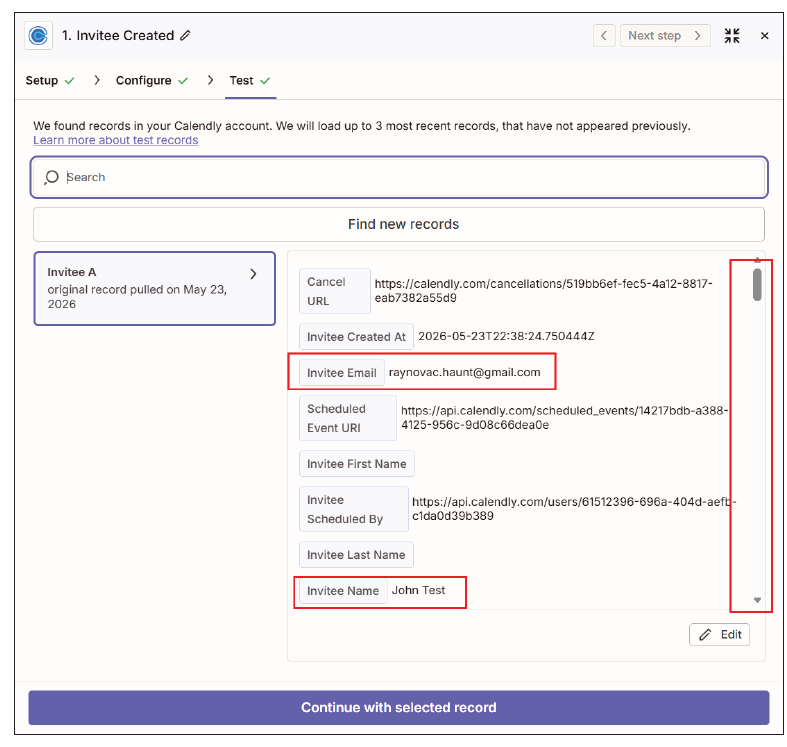
I click Continue with selected record, and the Trigger process is complete.
With the Trigger configured, I click on Action.
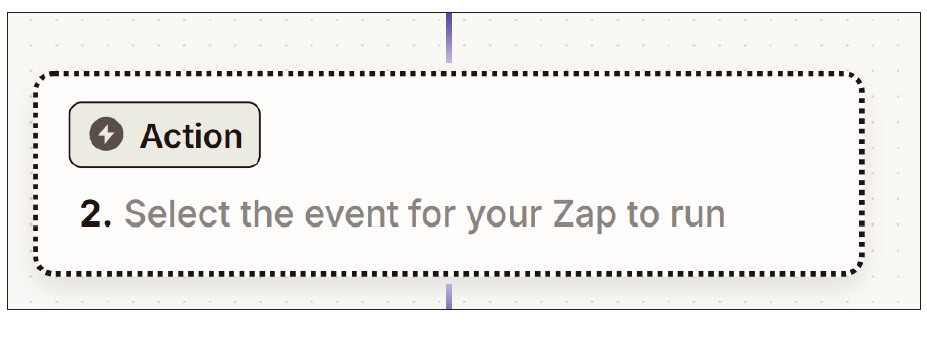
To add the App, I click Select, search for Pipedrive, and select it. (Once a selection is made, the available button then reads Change.) For Action event, I select Create Organization in the drop-down options. For Account, I connect to my Pipedrive account. I click Continue to move to the Configure screen.
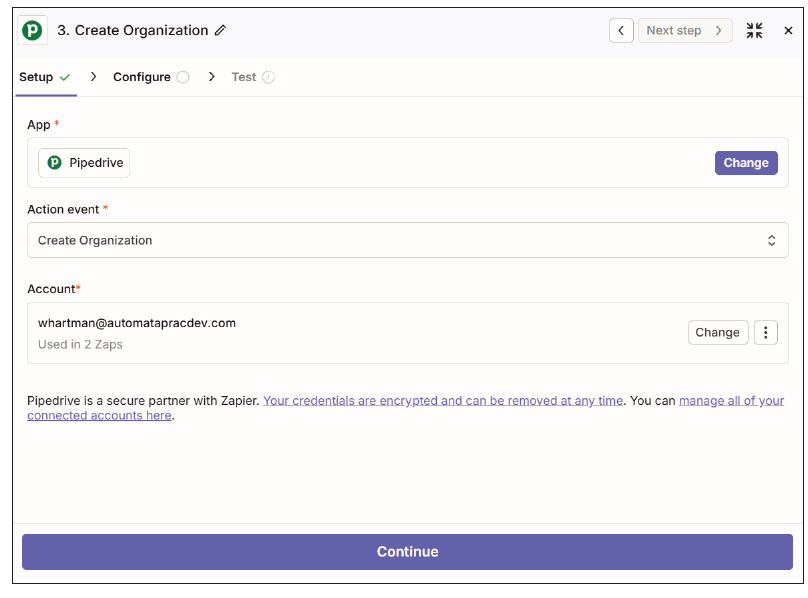
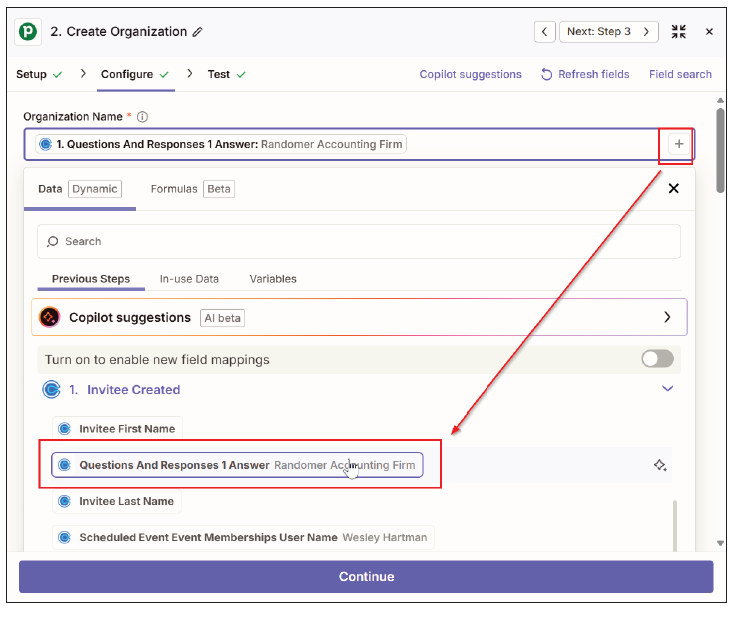
On the Configure screen, I click the + next to Organization Name and scroll down to Question and Responses for the organization name from the Calendly form. I click Continue and then Test.
After the test finishes running, I check Pipedrive to confirm the organization was created.
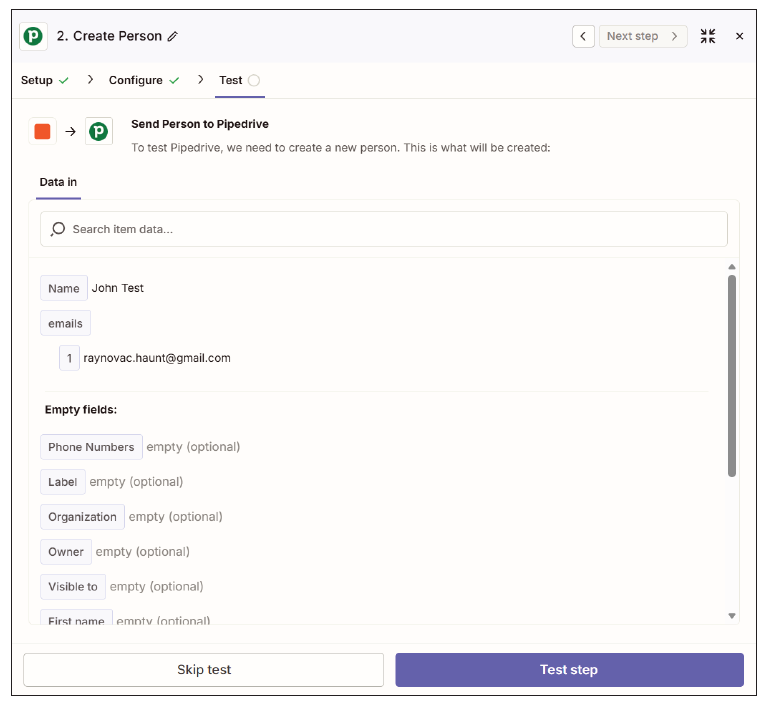
Next, I want to add the person. I add a new Action. I click Select in App, search for Pipedrive, and select it. From the Action event options, I select Create Person. Account will automatically populate, as shown in the following screenshot.
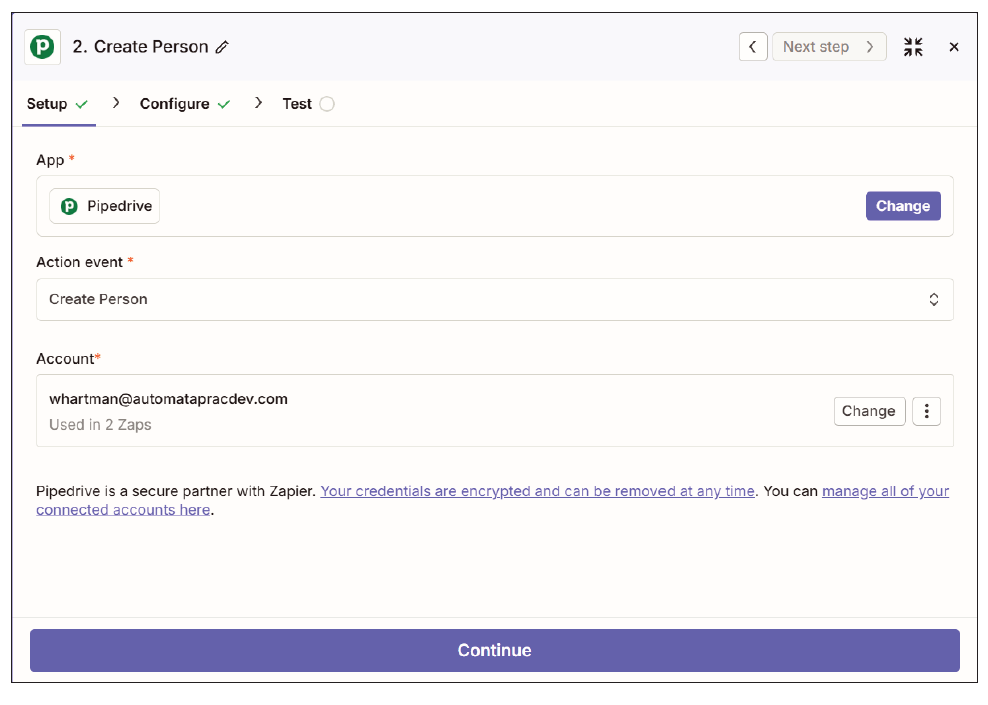
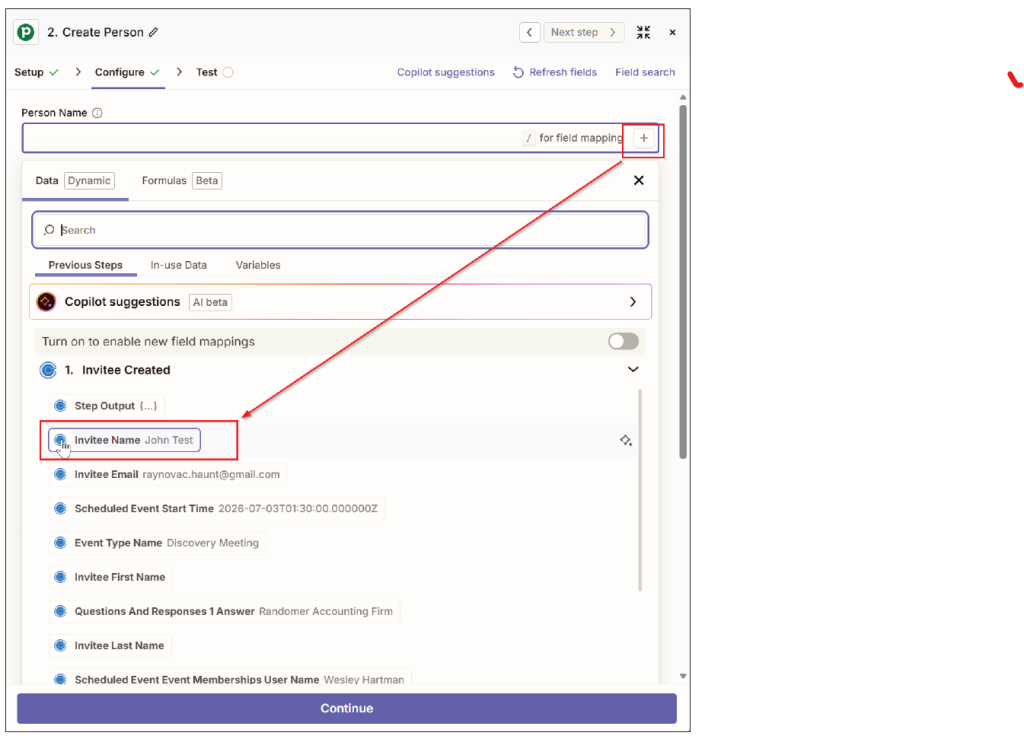
I click Continue to move to the configuration screen. For each field, I repeat selecting values for person and email address.
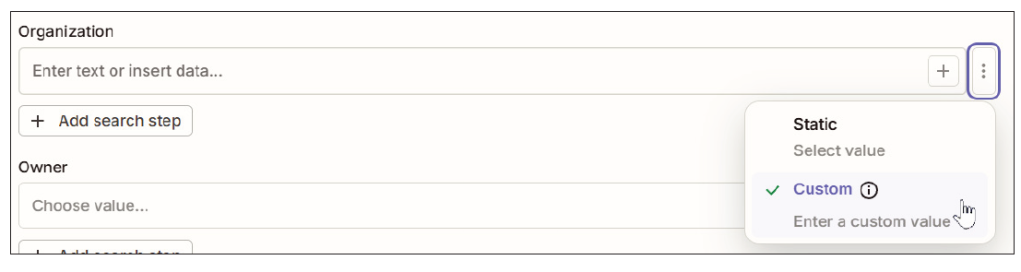
For Organization, I need to do something different. I need to switch from “Static” to “Custom,” as shown in the following screenshot.
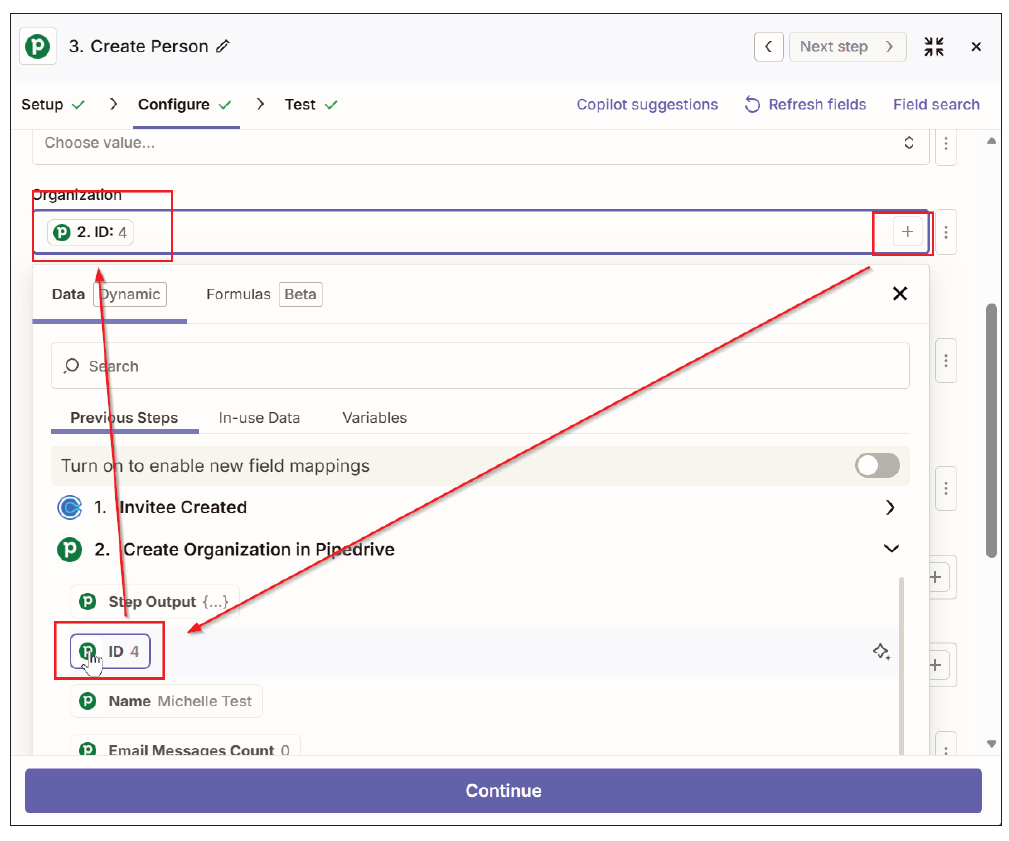
Then, when I select the value for the organization, I want to use the assigned Pipedrive ID rather than the name. I select this from the options of the “Create Organization” action we created earlier. The following screenshot shows selecting the ID from the Create Organization step.
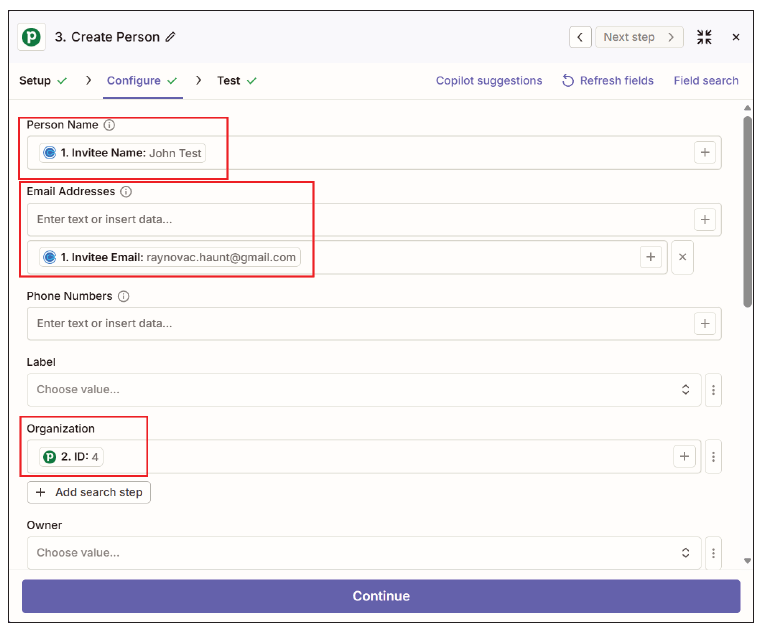
Once I’ve populated all the Organization fields, my screen options are shown in the following screenshot.
I click Continue, test the Action, and confirm the person was created in Pipedrive.
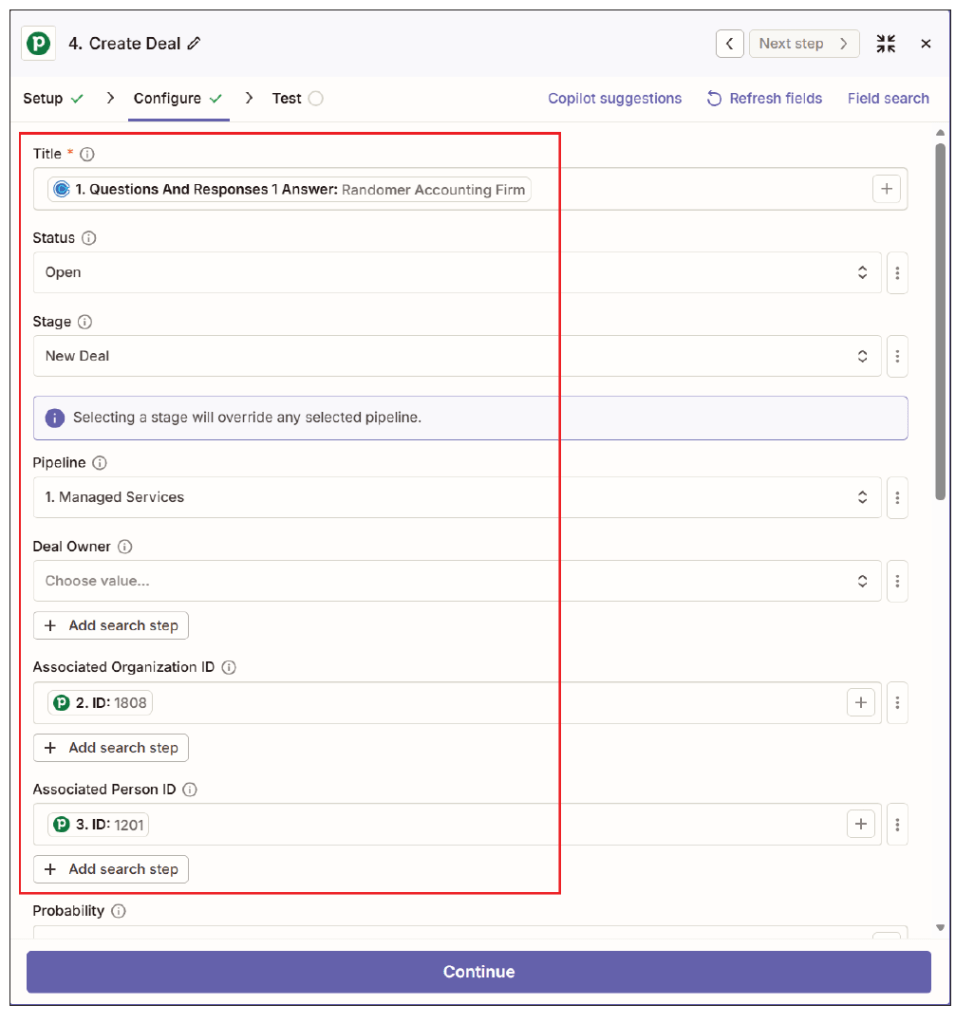
For the final Action, I want to create a deal in Pipedrive. I follow the same process. I click Action, search Pipedrive, select Create Deal for Action event, and start populating. I use the firm name as the Title and populate other fields like Status, Stage, and Pipeline. For Associated Organization ID and Associated Person ID, I switch them to Custom and select the ID from the corresponding prior step, as shown in the following screenshot. I click Continue, then Test, and then verify the deal was created correctly in Pipedrive.
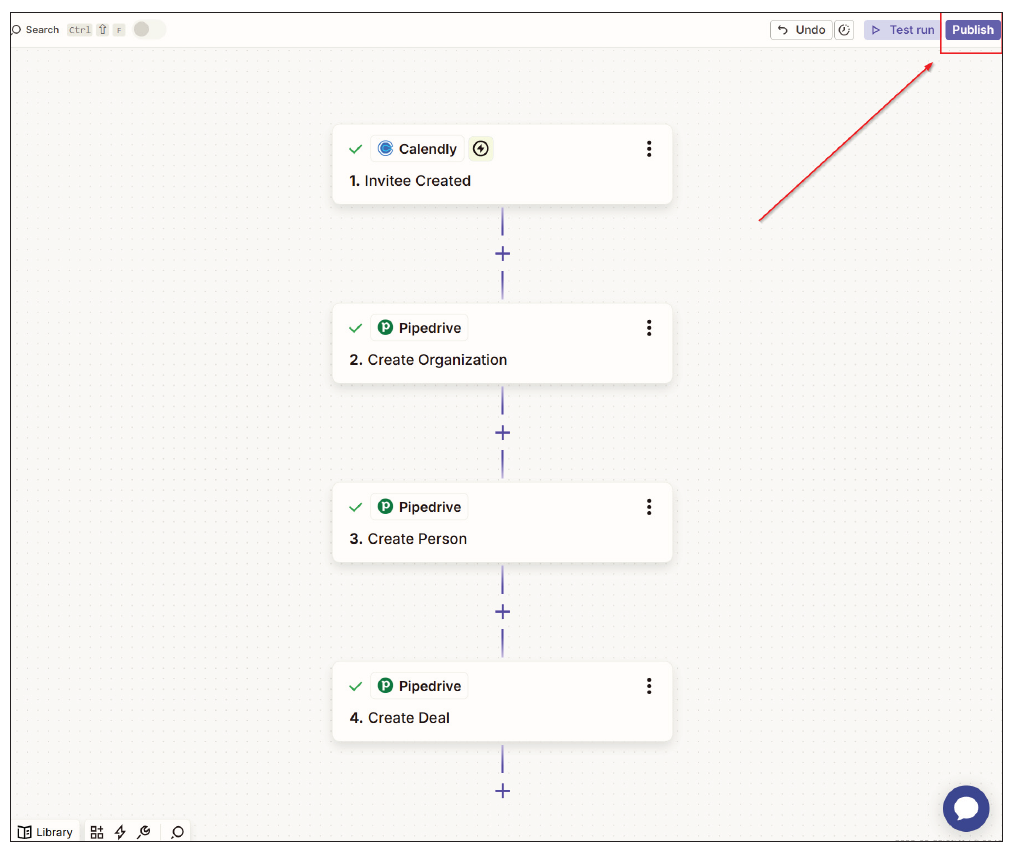
Since I have tested and verified that each action works, I am ready to publish. I click the Publish button in the top right corner, as shown in the following screenshot.
With the Zap published, I run a full test by going to my Calendly and scheduling a new appointment using new test data and a different personal email address from those I used for setting up the Zap.
With this published Zap, I’ve reduced the need for manually adding information to my CRM. If I have other apps that I want to add this information to, I can continue adding Actions to the Zap for those additional places where I need this information.
About the author
Wesley Hartman is the founder of Automata Practice Development.
Submit a question
Do you have technology questions for this column? Or, after reading an answer, do you have a better solution? Send them to jofatech@aicpa.org.