Optimize your meeting calendar in Outlook
Microsoft Outlook has several features that make it easier to schedule
Q. My Outlook calendars are becoming difficult to work with. What are tips I can use to help me create and manage meetings?
A. Microsoft Outlook has several features that make it easier to schedule meetings and help you manage and share your calendar more efficiently.
Reply with Meeting
It is common, after exchanging a chain of emails, to create a meeting with the people involved. The most common method to do so is to switch to the calendar, create a meeting, and then copy and paste the addresses from the email to the meetings.
The “Reply with Meeting” action is much more efficient. To do this, select the email and click the “Meeting” icon in the ribbon, as shown below.
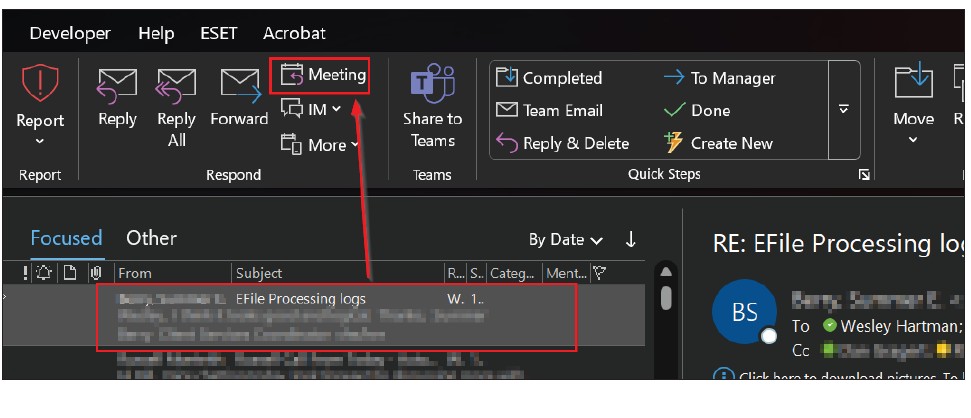
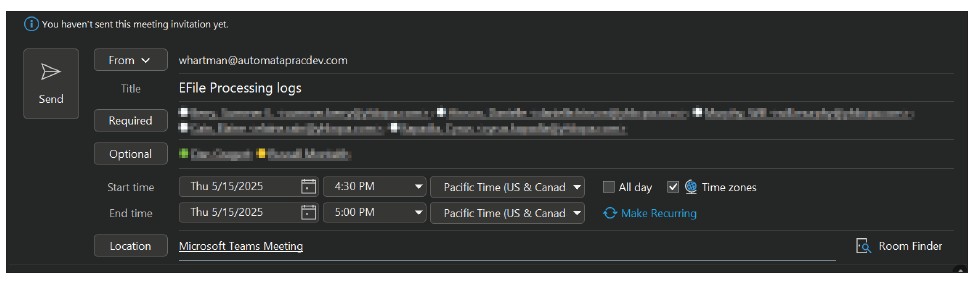
A new Meeting window will open already populated with the subject and the email addresses from the chain. The “Required” people will come from the “To” line of the email along with the person I am replying to. The “Optional” people in the meeting invitation will come from the “CC” of the email. By default, the meeting will be scheduled for the next 30-minute block on my calendar. See below for an example.
Scheduling Assistant
Before clicking “Send,” I want to use the “Scheduling Assistant” to confirm everyone’s availability and set the date, time, and length of the meeting. Using the “Scheduling Assistant” will stack all the attendees’ calendars to quickly identify when everyone is available. To get there, click the “Scheduling Assistant” tab in the ribbon.
I want to call out a few key items from this screen on the image below.
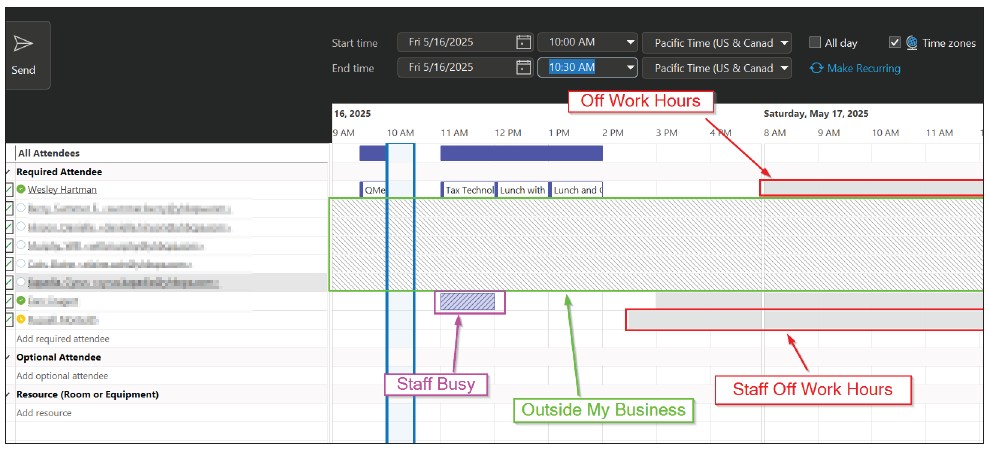
“Scheduling Assistant” uses the “Work Hours” set in my Outlook options to determine the hours along the top. Outlook, by default, sets work hours to be from 8 a.m. to 5 p.m. of my time zone. On the weekend, the screen will show the “Work Hours” but gray them out to remind me that is it outside of my set “Work Hours.”
If the meeting needs to be scheduled outside of my work hours, I can view the full 24 hours by clicking on Options → Show only My Working Hours to toggle off that feature. The “Scheduling Assistant” will gray out hours outside of work hours, which I have highlighted in red in the image above.
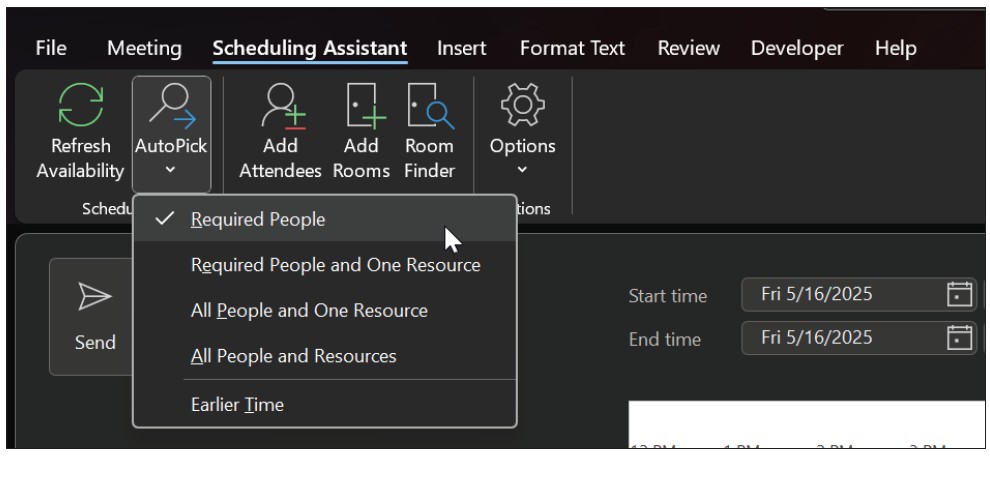
My Outlook has access to co-workers’ calendars. The purple highlight shows when these people are busy. A convenient action in “Scheduling Assistant” is the “Autopick.” The “Autopick” action finds the next open time slot across all the calendars that Outlook can access. To do this, I click “AutoPick” on the ribbon and select the option “Required People,” as shown in the screenshot below.
This feature works only with calendars Outlook can access. Because Outlook can’t access calendars outside of my company (these attendees are in the center area marked green), I primarily use “Autopick” with internal meetings. For external meetings, I will send my Calendly, which you can read about in my March 2024 Technology Q&A article, “An Efficient Way to Schedule Multi-Person Meetings.”
Sharing calendars
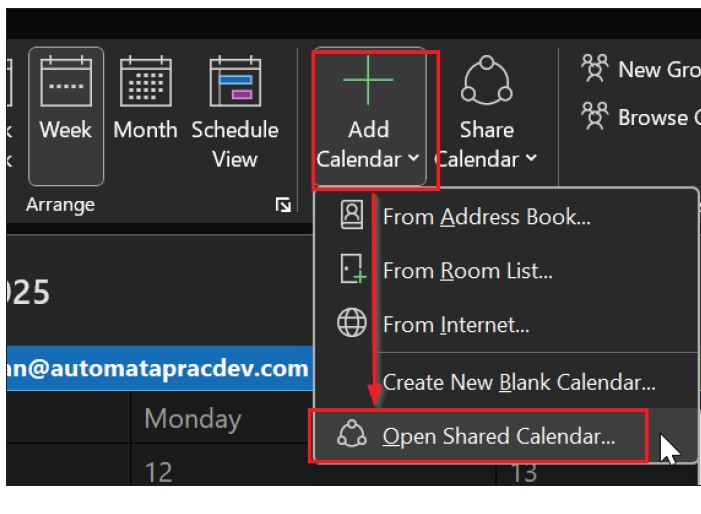
I like to have visibility of key staff calendars readily accessible. This helps me efficiently view people’s schedules and plan for meetings. Go to the “Calendar” section of Outlook. To add a calendar, I click on “Add Calendar” and then “Open Shared Calendar” from the ribbon, as shown in the screenshot below.
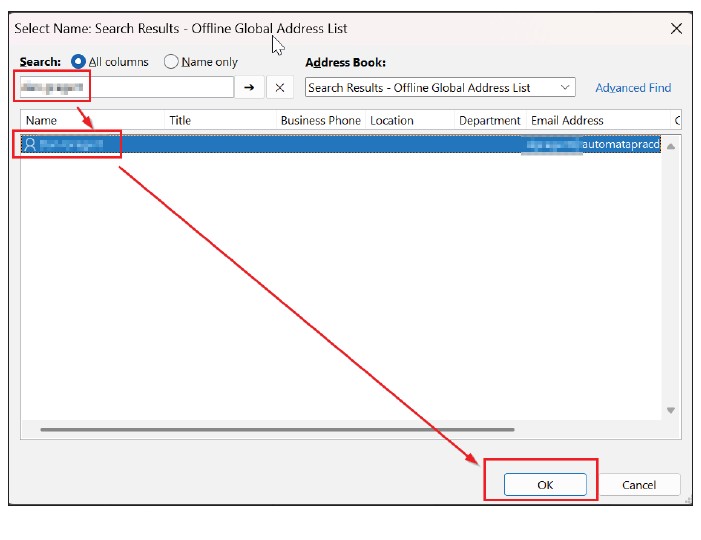
This opens a pop-up titled “Open Shared Calendar,” where I click the “Name” button. A list of available calendars will appear. I search for the person’s name, highlight it, and click “OK.” That person’s name will appear in the “Open Shared Calendar” pop-up. Click “OK.”
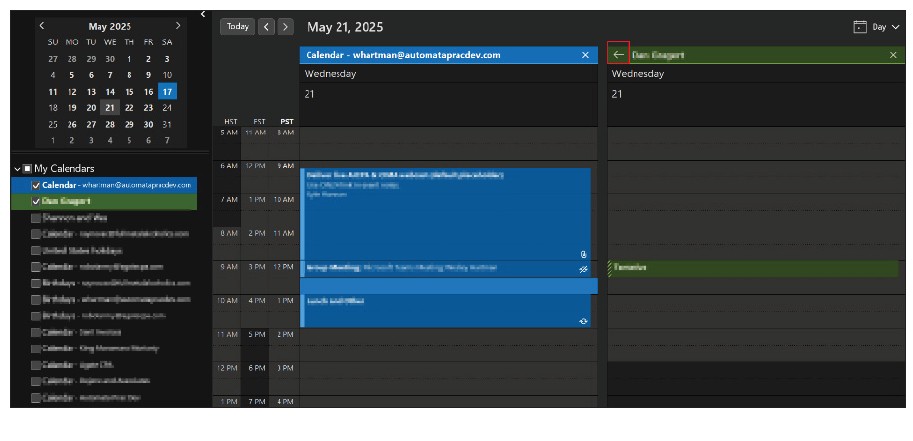
This will put the other person’s calendar and my calendar side by side in Outlook. One additional feature I like to turn on is the calendar overlay. This takes the side-by-side calendars and overlays them, which makes it easier to find free common time. To overlay a calendar, click on the arrow icon on the calendar tabs.
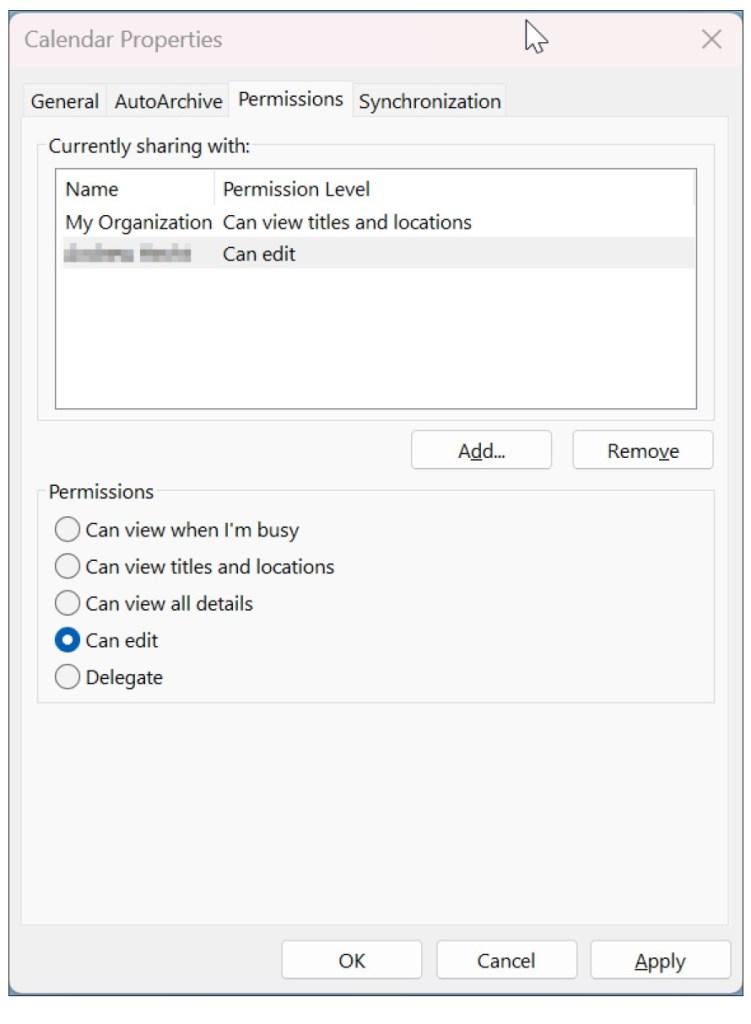
Permissions
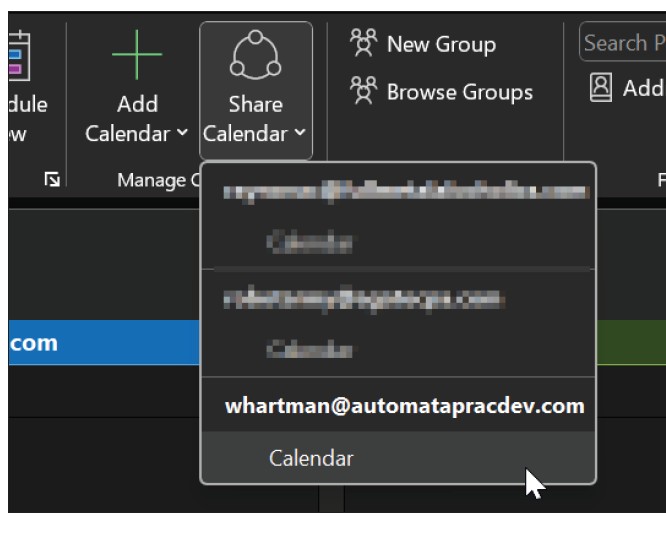
I can limit the visibility or expand the details of my calendar to others when they open my calendar as a shared calendar. To do this, I go to “Calendar Properties.” The “Calendar Properties” window is found in the ribbon by clicking on “Share Calendar” and then clicking on “Calendar.”
In the resulting window, shown in the screenshot below, I can adjust how many details can be seen. “My Organization” represents the default for other users. If I want more privacy, I can set the bullet to “Can view when I’m busy,” which only lets others see times blocked for meetings. For additional privacy, I can set it to “None,” so no one else can see my calendar. On the other hand, maybe I want someone to have editing rights to my calendar. I can use the “Add” button to add a person and set the permission level to “Can edit.”
Private meetings
Because permissions for “My Organization” are set to “Can view titles and locations,” all other users can see the basic information for all my meetings. In some cases, I want to set a specific meeting with a subject no one else can see. To prevent visibility for a specific meeting, I click on the meeting in my calendar and click the “Private” button on the ribbon, as shown in the screenshot below.
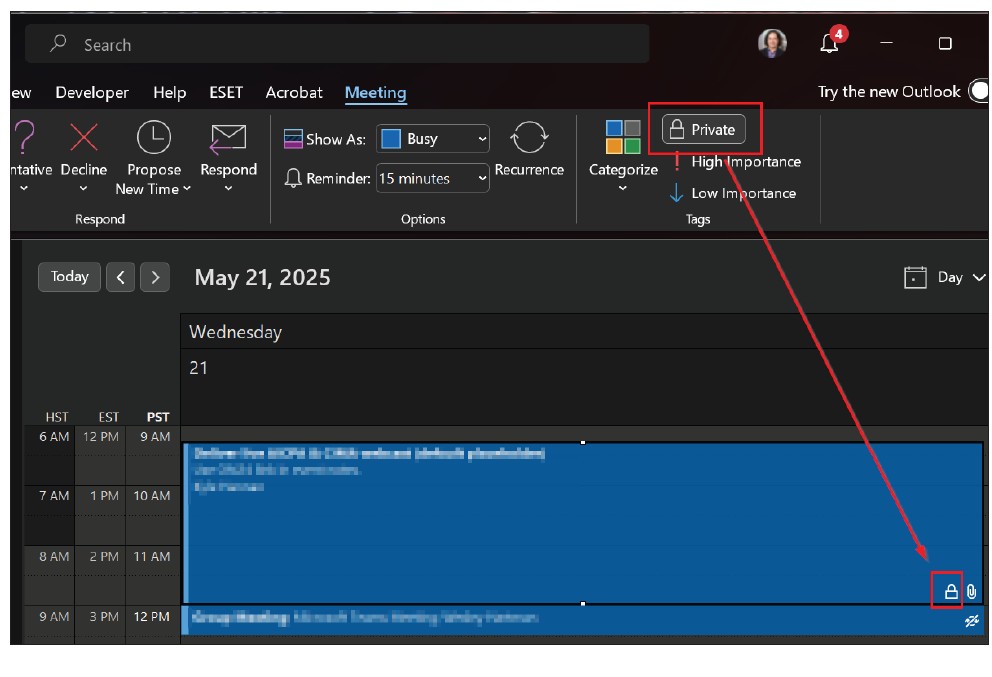
Setting the meeting to “Private” will add a padlock icon to the meeting to let me know that no one else in my organization can see the details. Other users will see the word “Private” when they look at my calendar.
These tips help me add meetings quickly from emails, visually manage multiple calendars simultaneously, and control the level of details others can see.
About the author
Wesley Hartman is the founder of Automata Practice Development.
Submit a question
Do you have technology questions for this column? Or, after reading an answer, do you have a better solution? Send them to jofatech@aicpa.org.


